Showing posts with label home decor. Show all posts

Friday, February 24, 2017

Home Renovation on 'Catch-all'


So finally I got around the painting the big elephant we saw 
every time we entered our home and came up the stairs.  
There is so much varnish on all the oak in this house! 

This is a picture of what we faced when we moved in.  
Orange and green walls and browns and green in bedrooms.


The story behind doing this project is simple…this wall will not be around for long (fingers crossed).  We plan to remove this shelving unit along with the mirrored closet.  This will deepen this space and open up into the kitchen.  The header that is open to the ceiling will be removed half way up exposing the kitchen all along that big wall.  This way it will have a much more open concept, without showing all the mess in the kitchen after I cook.  If you catch it in the picture, you’ll see the ‘oak’ cupboards/storage wall (another elephant) just inside the kitchen that will also be removed.  We will replace this with proper cupboards on the other side of kitchen and add an island. 


You can't really see in these pictures, but where I painted the dark blue, there are slight imperfections in the coverage.  
Note to self again: just because Chalk Paint can be used over varnished items, doesn’t mean you shouldn’t sand it.  The paint covered lovely but I should have sanded my little heart out to make it velvety smooth and then applied the coats of wax.  Because of the thick, bumpy coats of varnish, I think it affected the final look.  Oh well, it works for now, and it looks so much better.  


The next plan is to paint the gold trim around the mirror.  I’ve covered it in black duct tape and then I’ll use chalk paint to cover.  The rest of the wall will be the same as the shelving unit.


Well, time is precious and I need to finish this wall before any other big projects can start!

Bonny

Tuesday, September 13, 2016

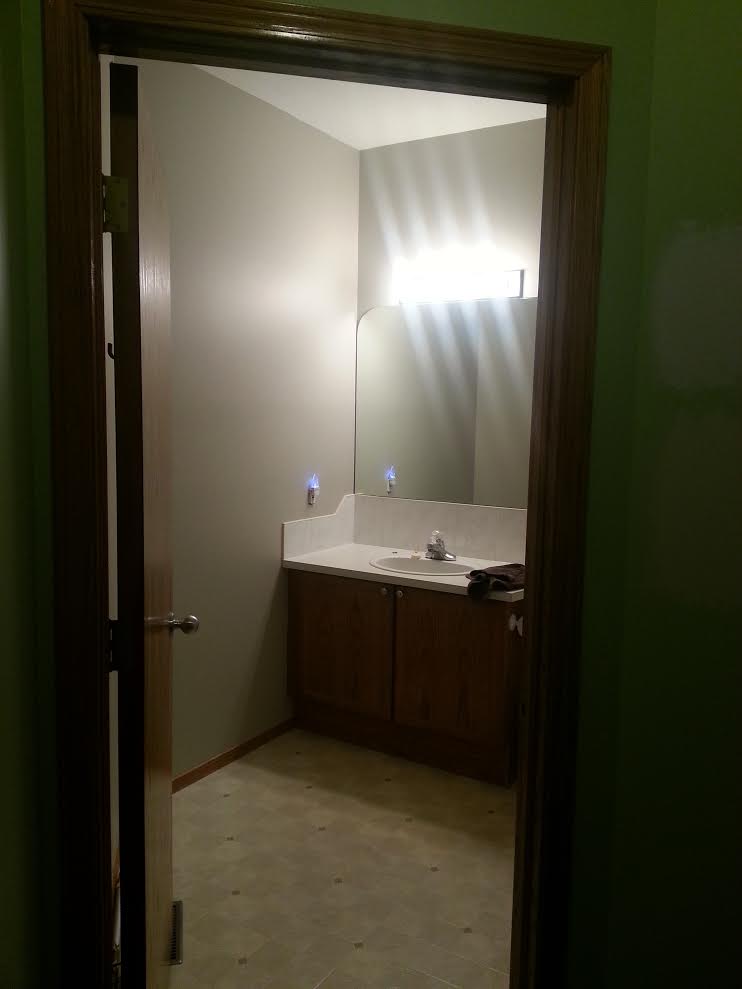
Main Bath - a work in progress


Things around our house sometimes happen at a snails pace  .  .  .  . like this main bath makeover.

One of the things I loved about this house when we bought it, after looking at several cookie cutter houses, was the 2 large 4-pc bathrooms with huge vanity space.  I still don’t have anything stored underneath because I also have a hallway closet.  Anyways I’ve started the bath on the main obviously because guests use it more. 

Suddenly my design ideas ran dry.  With all the magazines stacked in my office you’d think I had lots of ideas but no, I was frustrated, so I just began with paint.  It was so nice to get rid of the horrible hospital green. 

Eventually the entire vanity and counter will be removed and replaced with a new vanity or just a pedestal sink and a beautiful floor to almost ceiling cabinet to display nice bathroom ‘stuff’.  This won’t happen till we do the flooring and the kitchen probably. 

Anyways, here’s some photos for your enjoyment.  Please refrain from saying “what was she thinking?!”  I think this is the perfect time and room to try out some new ideas.  Have a look.


nope, this isn't the finished bathroom vanity . . . I wish though
~my inspiration from Hooker Furniture/Decorative Chests


looks almost the same right? 
except for the different color and design.  
The detail is hard to see in this picture


still working on the wall decor


the original just after painting


original - trust me they were in bad shape


I started with white because originally I thought the white would 
show thru nice when distressed - NOT
~see my helper?


it was too dark and I hated it, 
so I looked to Hooker Furniture for inspiration


I sanded them again to rough them up, 
obviously revealing some of the white paint


ta-da


Now for a new accent rug to cozy up your bathroom experience and of course wall décor.  I’m leaning toward a huge picture OR black and white old photos.  Who knows.

Thanks for reading or just looking at the pictures.


Bonny

Wednesday, April 9, 2014

Real Antlers - I don't do faux

 
These are the real thing! 

Not faux. 


All I did was embellish them a bit.

Now they look great on my coffee table

and

they are a conversation piece.


They are from my dad’s collection of horns and antlers way back in the day
when he was an avid hunter and fisherman. 

I wish I had pictures to show you,

but they are all stashed away in a safe place for now.
 

I can’t just show you pictures before I tell you

a short behind these antlers. 
(Unless you'd rather skip to the pictures, that's ok too)
As a big hunter and fisherman, there are a lot of photos in boxes, on reels and slides that someday need to be stored better so that they keep.  I remember dad going hunting with his dad and coming home with something crazy like 7 deer and 3 moose.  Mom and grandma would bake and prepare food for them to take for that time.  Probably a week or so they’d be gone.  Back then we butchered the meat ourselves.  It was great times.  I grew up eating wild meat and lots of fish.  We all had to help on butcher day.  Depending our age, my sisters and I either were taught how to cut up meat, grind hamburger, package hamburger or write on the packages.  You had to write neat we were told.  Nobody ever lost a finger to knives or the grinder.  The dinner meal was always prepared by my grandma.  She’d be cooking upstairs and we’d be in the basement cutting up meat.  In grandpa’s garage, there hung all the moose horns and deer antlers from all the hunting trips.  There were a lot of them!  I’ve been lucky in being the one to take them home with me.  And yes there are a few moose horns in my basement.  They're a little too big for the coffee table.  While a lot of them are beautiful just as they are, a lot of them look best with a little glam.
 
Have a look at what I’ve done with a few antlers. 
Notice the natural bone color still shows thru in places.
I used Old White and Graphite 'chalk paint'.


Hope you weren’t to ‘wierded’ out with this post.
Do you think this would add a little something to your
mantle or coffee table,
or how about the hubby’s den?

Monday, February 10, 2014

Graphite & Stain Together Forever

This is my first attempt at a two-toned furniture re-do and I really must say it turned out pretty good. I think a lot of it depends on what color you love to paint and where you leave the natural wood to show.  The combination has to work.
 

Every piece I buy has some story of course.  We sometimes visit the Thrift Store on Saturdays but this particular weekend the furniture area was pretty picked over.  Lonely stood this square table.  I loved the curvature of the legs, the lip on the top, the width that framed the top and the height.  For $12, I really couldn’t go wrong even if  I did nothing with it for years. 
That’s only 2 fancy coffees to give up really. 
BUT, for some reason we walked away.  LATER that week, I called the store because I couldn't get it out of my mind and it bugged me that I didn’t buy it.  It was still there waiting for me!  I even took my lunch hour to go get it leaving only 20 minutes for eating.  No, they are not open after 5:00.
So, in my basement I turned it around several times debated what to do.  I knew I was going to paint it Graphite but it needed a special “wow” factor.
So, here’s what I did.
 

I started to sand parts of it.  The wide border around the top and lip was sanded and prepped for stain – the same stain as our woodwork in the house. 
 
Then I sanded just the corners of the legs.  Later, I would distress the paint to reveal the natural wood and the wax would hi-lite it. 
That’s the beauty of Chalk Paint. 
 didn’t need to sand the entire table. 


Now the paint.  This photo above is without any wax so it looks very dull.
Yes if you noticed I did sand and stain the lip and then painted right over it. 
WHY you ask? 


Because I wanted this affect.  A little distressing to reveal the stain beneath.


I used clear wax first to soak into the paint then dark wax to give a richer tone.  Here you see the corners soaking up the dark wax.


Eventually I think I will get a glass top just because this table is used A LOT .


Have a good week.  I’m getting onto the next project in the basement.

Sunday, January 19, 2014

At Ends

 
I’m really going to miss these two beauties.  They ended up being the exact color I’ve been looking at adding to our living room.  I didn’t plan it that way, but now that they are done I’d love to keep them.  When you see the photos you’ll notice, just as I did, that they are too large for our space.
So, they are up for sale.
 
The process was too long for these two projects. 
If you’ve read the previous posts, it was because of
more important life events. 

Originally there was not going to be any distressing. 
Sometimes, I’m just not a fan and want to try NOT doing it. 
Well, these just weren’t looking so great.  Even my husband didn’t say much. 
So I dragged them back downstairs and sanded and added dark wax. 
Then I waited.  The next day I buffed, leaving some of the dark wax on. 
I loved the new look! 
Even the husband said they looked so much better with a little personality. 

Even if you’re not a fan of the distressed look, these have just enough
to work in your hoity-toity living room. 


Don’t you LOVE the vase on the end table? 
That was one of my Christmas gifts from my daughter. 
See, it would look so good together in our room. 
Ya, I tried that too on the hubby, but they are still too large. 
Better off in someone else’s rec room.


Time to stop being blue and get going on another project.
Have a good Sunday.
Related Posts Plugin for WordPress, Blogger...